Tuesday, December 1, 2015

Automate creating vhost and installing new rails project


A programmer must learn to automate mundane and iterative tasks to save time. Many technical and non technical people have understood the true power that can be achieved by automation.

I create personal vhosts for each different project, so I had certain tasks to follow every time when I would encounter something like this. Some months ago I wrote a ruby script that does all this. It reads the content of your vhost file in /etc/vhosts and creates a vhost and new rails project for each of those domain.

Link to Alchi_vhost

Friday, November 27, 2015

My super power of forgetting password let to "Reveal Password" chrome extension


People are different because each of them possess certain unique capabilities and I am no different. I have this unique ability of quickly forgetting my passwords. Oh heck, who has the time to remember passwords, right? You can save your passwords and this feature is already provided by most of the browser and what I meant by "most of the" is chrome and firefox. They are the only two browsers I use and I have no idea for the rest, I am sorry.

It may be very weird to hear that I can not remember my password and I call myself a programmer. haha, common guys it is weird right?

So ya that is my super power and I do not want to show my super power. Just as batman wears a cape and mask and changes his voice I too had to do something to hide my power. Out of all the things in the world all I am capable of doing is coding. So instead of sewing cape and a mask and putting on a hoarse voice I decided to write a chrome extension that would reveal my password. Hey do not get excited, it is nothing fancy because I chose not to wear my underpants outside my costume.

Ok like I have already said, browsers already have a built in function to save the password if you let it to and it will remember that very specific password for that specific site. But the catch is the password field is unfathomable.

What if you had saved all your passwords in your chrome and you browsed firefox? If you are like me, we should be friends, no lets be best friends, you are screwed. But as I know some tricks like opening a inspector and then blabla that is very tedious to do every time plus if you do not have knowledge of inspector tool then you are really screwed.So ya at this situation, you can use my extension and then just like the batman coming out of nowhere,  baam, boom, kapow, no more dots in your password field. You can now know what was you password and live happily ever after.

Well I am still looking for a princess so my story does not end there. I use VC`s a lot and stupidly and indolently I avoided adding ssh keys. So yo know I had to go to the main site , then logout and then check through my inspector and then log in again.Well, now no more.

Here is a link to the codebase .
Download the extension here

Thursday, November 26, 2015

Why I moved from capistrano to mina to deploy my app?


To be honest, I have just started to use deployment tools because doing the same thing over and over again was getting very tedious for me. I first started with capistrano and it was good I guess.

Why I prefer Mina over Capistrano?

While Capistrano is a really really great tool , it is terribly slow. Since time is money for every one of us, I wanted a tool that would not be so painfully slow and easy to use, you know , that get shits done. Then I met Mina and instantly fell in love with it when I browsed its homepage and read its slogan "Really fast deployer  and server automation tool" .

Before I was using any deployment tools I was manually ssh`ing into my server and then cloning the repo from the git then running bundle install , rake db:migrate and a lot of stuffs that is not very interesting to do repeatedly. If I had pushed any new updates to the repo I would have to ssh into the server and do the same thing which is time consuming as well as not very productive. So I highly reckon anyone who is not using deployment tools to use it and feel its power. But remember Great power comes with Great responsibility. :)

It is dead simple to get started with Mina. All you have to do is add a gem run the bundler, create a deploy.rb file , fill the right info in it and running mina deploy. The best part is you can write rake tasks in deploy.rb.

Either run gem install mina or add mina gem in your gemfile.
Run bundle install if you chose the later option.
run mina init in your working directory
Here is my deploy.rb file
require 'mina/bundler'
require 'mina/rails'
require 'mina/git'

# Basic settings:
#   domain       - The hostname to SSH to.
#   deploy_to    - Path to deploy into.
#   repository   - Git repo to clone from. (needed by mina/git)
#   branch       - Branch name to deploy. (needed by mina/git)

set :user, 'ubuntu'
set :domain, 'www.fuitter.com'
set :deploy_to, '/usr/share/nginx/html/fuitter'
set :repository, 'git@bitbucket.org:mc_cannibal/fuitter2.git'
set :branch, 'master'
set :forward_agent, true

# Manually create these paths in shared/ (eg: shared/config/database.yml) in your server.
# They will be linked in the 'deploy:link_shared_paths' step.
set :shared_paths, ['config/database.yml', 'config/secrets.yml', 'log']

# Optional settings:
#   set :user, 'foobar'    # Username in the server to SSH to.
#   set :port, '30000'     # SSH port number.
#   set :forward_agent, true     # SSH forward_agent.

# This task is the environment that is loaded for most commands, such as
# `mina deploy` or `mina rake`.
task :environment do
  ruby_version = File.read('.ruby-version').strip
  raise "Couldn't determine Ruby version: Do you have a file .ruby-version in your project root?" if ruby_version.empty?
 queue %{
   source /home/ubuntu/.rvm/bin/rvm
   rvm use #{ruby_version} || exit 1
 }
end

task :setup => :environment do
  queue! %[mkdir -p "#{deploy_to}/#{shared_path}/log"]
  queue! %[chmod g+rx,u+rwx "#{deploy_to}/#{shared_path}/log"]

  queue! %[mkdir -p "#{deploy_to}/#{shared_path}/config"]

  # Add the repository server to .ssh/known_hosts
  if repository
    repo_host = repository.split(%r{@|://}).last.split(%r{:|\/}).first
    repo_port = /:([0-9]+)/.match(repository) && /:([0-9]+)/.match(repository)[1] || '22'

    queue! %[
      if ! ssh-keygen -H  -F #{repo_host} &>/dev/null; then
        ssh-keyscan -t rsa -p #{repo_port} -H #{repo_host} >> ~/.ssh/known_hosts
      fi
    ]
  end

  # Create database.yml for Postgres if it doesn't exist
  path_database_yml = "#{deploy_to}/#{shared_path}/config/database.yml"
  database_yml = %[production:
  database: fuitter
  adapter: postgresql
  pool: 5
  timeout: 5000]
  queue! %[ test -e #{path_database_yml} || echo "#{database_yml}" > #{path_database_yml} ]

  # Create secrets.yml if it doesn't exist
  path_secrets_yml = "#{deploy_to}/#{shared_path}/config/secrets.yml"
  secret =
  secrets_yml = %[production:
  secret_key_base:
    #{`rake secret`.strip}]
  queue! %[ test -e #{path_secrets_yml} || echo "#{secrets_yml}" > #{path_secrets_yml} ]

  queue! %[chmod g+rx,u+rwx,o-rwx "#{deploy_to}/#{shared_path}/config"]

end

desc "Deploys the current version to the server."
task :deploy => :environment do
  to :before_hook do
    # Put things to run locally before ssh
  end
  deploy do
    # Put things that will set up an empty directory into a fully set-up
    # instance of your project.
    invoke :'git:clone'
    invoke :'deploy:link_shared_paths'
    invoke :'bundle:install'
    invoke :'rails:db_migrate'
    invoke :'rails:assets_precompile'
    invoke :'deploy:cleanup'

    to :launch do
      # queue "mkdir -p #{deploy_to}/#{current_path}/tmp/"
      # queue "service #{user} restart"
    end
  end
end

# For help in making your deploy script, see the Mina documentation:
#
#  - http://nadarei.co/mina
#  - http://nadarei.co/mina/tasks
#  - http://nadarei.co/mina/settings
#  - http://nadarei.co/mina/helpers

then run mina setup and finally mina deploy.
That is all there is to it.

Saturday, November 21, 2015

Hiking to chisapani (A must do hike)


TL;DR
Chisapani is very expensive but it is even more expensive for foreign tourist. I would highly recommend to take some dry foods from home.
It took us 7hrs to reach chisapani from sundarijal, and 5 hrs to get back to sundarijal from chisapani.
Warm clothes is a must because it gets frigid at night and in morning.
Great view of mountain (Langtang, annapurna range, MT everest, ganesh himal)
Ever wondered how a sky full of stars looks like?  Get out of the lodge or hotel in somewhere between 11pm - 3am and look up at the sky.
Safe for solo hike too.

price list(this does not apply to foreign tourist)
plain tea Rs 20
hard boiled eggs Rs 30
plain pankcakes Rs 60
plain dinner Rs 200
room Rs 800 - 500
marijuana Rs 250
coconut biscuit Rs 25
jumbo wai wai noodles Rs 150
local alcohol Rs 100

Link to all the pics

About 8 months ago, I heard about this place via my colleague, then I did some research but could not find much resources on the internet however the ones I found were enough for me to add this place in my wish list. I was planning to go alone but a friend of mine showed interest in going there too so I formed a group of 6 peeps and we left for sundarijal at 7 am from old bus park.

Selfie from the roof of the bus
To make our ride up to sundarijaal adventurous we traveled on the roof of the bus. Since, I had the responsibility of taking care of expenses I had to pay Rs 250 for the fare.

View from the hotel we had our breakfast at

After reaching sundarijal we took a light breakfast (6 eggs, 6 doughnuts, 2 plate fried chickpea, 1 plate fried aloo, 3 bowl of tarkari ) spending a total of Rs 300 and resumed our hike afterwards.


It felt really great to see these huge metal pipes in reality than read about them in the blogs I found.

Rainbow
Entering Shivapuri National Park


To start our chispani hike, I had to pay Rs 50 just to enter the hiking trail.


We swam in this river

First visual of the mountain
We stopped for chyang in one of the hotel along the way and the owner was very gregarious. He shared how devastating the earthquake was to him as he had loose his house. Up to this point, foods are very cheap compared to chisapani. We paid a total of Rs 135 and they also filled the remaining chyang in their own bottles and did not charged us for it and they also filled our water bottle with drinking water. He then showed us the way to chisapani and we left. We got so excited when we had our first visual of the mountain.
The only river to accompany in the whole hiking trail


First visual of Chisapani
Walking for almost 6 hrs we were so exhausted and hungry. All the way we talked about how tasty the fried chicken in the dinner was yesterday. When we saw hotels at Chisapani, we all got excited.


Mountains as seen from Chisapani

Destruction caused by earthquake
After reaching there, we sat down for tea and 2 packets of biscuits for each of us as there was nothing much to eat at the hotel. A packet of biscuit cost Rs 15 and plain tea cost Rs 25. We then found a cheap lodge. I paid Rs 500 for a room, Rs 60/pancake, Rs 30 for an egg and Rs 200/person for dinner. We had brought 6 cans of tuna with us so dinner was really like a feast.
Sun rise in morning

Again, mountains
It was a very fun hike up to chisapani but there is a lot of pollution along the trail. Well the good thing is we completed this whole hike in just Rs 6000 and staying in budget.

Thursday, October 29, 2015

Places I travelled in a year

Has it been a year this quick? oh yes it has. I remember the first time I watched FRIENDS, 2 years ago. Any way, traveling was not always my favorite thing to do until a year ago when I traveled to Pokhara. Since my childhood I have always been afraid of adventures and the jungles and the things that live in the jungle. But my first tour to Pokhara changed everything.

Since that day, I have been traveling awfully a lot, and my parents complain about it. To be fair, I have also trekked solo up to an altitude of 3800m.

Places I have traveled to

Pokhara on Oct 2014
MT flight on Jan 2014
Jhor on May 2015
Dolalghat on June 2015
Kulekhani - Chitlang on Jul 2015
Kalinchowk on Sep 2015

On my wishlist

ABC trek  (2016 april 9 -14) trek completed
Langtang trek (covering Gosainkunda)
Chisapani  (this hike is completed)
Chamadevi (this hike is completed)
Rara (far cry)

Pokhara
MT Flight
Jhor
Dolalghat
Kulekhani

Chitlang
Kalinchowk

How maggie worn me out ?


Maggie is a facebook app, that lets you add filter with your name and change your profile picture. I would not have bothered building an app that was already built by many talented developers out there. But we offered something different than the rest of those apps. A friend of mine proposed that we add the name of the user in the image because it would make our app a little different than what is out there. I loved the idea. Another friend of mine told me to finish this app as soon as possible, 24 hrs, urgent. When a programmers hear the word "URGENT", they loose control and screw things up. I am no different than them.

I started developing the app, while the login with facebook and getting the logged in users data was finished in a matter of minutes , the main problem was merging the user`s image with the overlay and to make it even worse adding text to the image with a different font style.

Day 1

Finished login the user using fb, getting users data, adding users to database. Then I had to merge those images, so I tried couple of different techniques. The first was using the user`s image as a background and the overlay image in the img tag. But that was a noob mistake. Then I tried canvas. It worked but since I needed to download the image to send it to the graph api, I could not convert the base64 into the real image. So I had to drop that and go with rmagick. After a couple of hours of hair pulling, what seemed impossible was done. So the next step was to add post to facebook and make it profile picture. After a while of googling, it was also solved. Seriously, why do not we call programming, stackoverflowing and we are the stackoverflow bots that rely on the very first result we get on stackoverlfow without even understaing the problem or the system we are working on.

Day2

As my friend wanted, text on the image, I had no idea how to do that. But why fear when stackoverflow is there? Some one already had the problem I had and it was solved too. Ctrl c+ v, god I need to change this habit.  Text was added , fonts was working perfect until , until I had to push it to production. Then it was just hell.  Fonts were not working as excepted. This time no google or no stackoverflow could help me but I was very determined. So I wrote a simple ruby script with the same image manipulation code and ran it and surprisingly it worked. Then I tried it on my rails app but it did not work. I had to google the whole night.

Day3

It was raining, cold and the right excuse to cancel my morning walk. Got my laptop and started working on it again from 6 am. Little did I knew, it was already 10 am and still I had no luck plus I forgot to take my medications. Is that determination?? haha I hope so. Then I made the rails app to execute the ruby script I wrote to manipulate image but again it did not worked. I still have no idea why? Why was it not working? I finally gave up and settled for the default font. Now even though there are some problems with the app , I feel like I have accomplished something that I thought I was incapable to develop.

There is something I have learned though.
If a certain tool that you are using, does not make your life easier, then stop using it.
Brace yourself while pushing the code to production mode and pray to Buddha (God).
Never push security keys to VC`s.
Premature optimization can be hell.
First get the functionality that your app depends upon then work on the rest.
TDD development is for those who have still plenty of time left to code.

Saturday, October 24, 2015

Why I would avoid materializecss for my next app?


Material design is taking over the UI/UX by storm these days so I also decided to give materializecss, a CSS framework, a try. I heard about this framework through my colleague and it did surprised me with its tons of cool effects.

So for my app, Fuitter, I added the framework using the materializecss gem because I was not able to make the fonts work by manually adding the links to files.(it was a bummer)

Materializecss have everything I needed for my app`s design, like the side nav bar, wave in the buttons and more. While the materializecss team is doing a great job with its framework, I am planning to not use it anymore in the future.

I wanted a select field for the TLD in the domain section and I rendered it  using rails form helper but after I refreshed my page the select field was not rendered, it was present in the DOM but it was hidden. I had to spend a good one hour before the Eureka moment hit me. The default select field in materializecss overrides the browser default property, so to render it I had to use javascript and that is not cool. So why the heck this is not cool? What if I had dynamically created select fields? Meteorjs renders view on the fly , so I would have to write tons of logic in each template to initialize the select every time the view loads.

<%= form_tag() do %>
    www.
    <%=  text_field_tag(:domain_name) %>
    <%= select_tag(:tld, options_for_select([['.com', '.com'], ['.org', '.org']])) %>
<% end %>

This will be hidden until you add some javascripts.
<script>

$(document).ready(function() {
    $('select').material_select();
});
</script>

So, the design of select functionality in materialize CSS is, in my opinion, a pretty good reason not to use it.


By the way, the wave effects in the buttons also has the same problem.

While materializecss provides a lot about all the 'effects' modern apps will demand I'm not sure those types of designs and concepts fit into large scale software just yet.

Sunday, October 18, 2015

Phusion passenger with nginx


Lately I decided to do something different than I was usually inclined to. I was using unicorn as my web application server in my development environment so I wanted to use Phusion passenger.  I was looking forward to use passenger in my production environment, so I thought how about I learn it now to install and run it in my development environment ? It took some time for me to wrap my head around it but eventually I figured it out.

I already had my nginx installed but I had to remove it because I screwed some config files while figuring out   passenger. Any way, the beginning is always the hard part.

I am assuming that you have no nginx installed.  Run this command, it will walk you through a very easy process of installing the server with passenger.

rvmsudo passenger-install-nginx-module
After everything is done, navigate to localhost in your browser. It should be working.

If you have ruby installed via rvm then no problemo. In your terminal run

Open up your /opt/nginx/conf/nginx.conf file and add the value of command from the terminal output to passenger_ruby

passenger_ruby /home/sushant/.rvm/gems/ruby-2.2.3/wrappers/ruby;

The work is still not done yet. You still have to put the right value for passenger_root. Just type

passenger-config --root
and it will output the location to the passenger. Copy that and paste it in your nginx.conf file like so

passenger_root /home/sushant/.rvm/gems/ruby-2.2.3/gems/passenger-5.0.20;

Now browser localhost and you will see the default nginx page.Lets add a vhost in case if that is what you are looking for.

server {
        passenger_ruby /home/sushant/.rvm/gems/ruby-2.2.3/wrappers/ruby;
        rails_env development; # add this if you get error like “Incomplete response received from application” from nginx / passenger
        listen 80;
        server_name sushant.com *.sushant.com;
        root /usr/share/nginx/html/fuitter/public;

        # You must explicitly set 'passenger_enabled on', otherwise
        # Passenger won't serve this app.
        passenger_enabled on;
    }

Ok now to make your changes take effect, you have to restart your server. I had to download an init script because it could not find nginx command. So if you had the same problem, again, I got you covered.
git clone git://github.com/jnstq/rails-nginx-passenger-ubuntu.git
sudo mv rails-nginx-passenger-ubuntu/nginx/nginx  /etc/init.d/nginx
sudo chown root:root /etc/init.d/nginx


Thursday, October 8, 2015

Laravel for RAD


Just as good as rails, laravel can really speed up the development process. I finished a fully functional real estate system in a day. Yes there were not much requirements plus I did not follow TDD but that is just whole another story.

As laravel provides authentication out of the box, I had to spend couple of minutes configuring it. Since my app required different access control, I used a module that helped me setup the ACL in few minutes. Since CRUD is a frequent visitor I used another composer package for it and again the setup took just few minutes. The crud generator followed repository design pattern.

Importing the project assets were as easy as ABC`s unlike in Rails where you have to understand the esoteric asset pipeline.

Since it did not provided default generated test codes for the codes I generated I may end up solving a bug or may be a crisis in the near future. Rails is much generous with this and Rspec with Capybara makes testing even more fun.

Eloquent makes it even simpler to query from the database.

Package I used for:

acl: Entrust
generator: CRUD generator
data tables: Data Tables


My fetish for scaling Everest

Everest as seen from the window I sat during my MT Flight

Scaling Everest can cost a fortune or even a life and that is what ignites my passion to summit the world`s highest mountain. In every step there is danger , waiting for the right moment to violently shake you from the feet down and swallow you into its deep crevasse or maybe put you to sleep under its massive blanket of snow and if you are lucky , altitude sickness, hypothermia. When you get caught in these, death is inevitable.

Top of everest as seen from the cockpit
I am pretty sure that this alacrity to climb the Everest did not engendered because I watched the Everest movie. I had a dream to summit it before that but after my first solo trek.

MT everest covered with clouds
I did a lot of research on Everest and the results were astounding. If we push our body beyond its limit, we end either die trying or we make a history. There are many fatalities around the year trying to scale Everest but still people risk their life to climb it because they know that whatever maybe the consequences the risk is worth it and I feel the same too. 2013 avalanche was a deadly one as it killed many Sherpas and sadly among them was a father of one of the girl I knew from my high school.
With the blistering cold temperature and fierce wind to just make it worse, the summit may seem impossible. At these altitude the weather changes in a fickle.
Standing 8848m above , you can realize how tiny you are and how cosmic the space outside the earth is. I probably bet, I will mistake the view from summit analogous to heaven.  I wonder how the sky will look from there. Will there be any clouds above than us? How will Mt Kangchenjunga look, piercing the benevolent looking clouds, that looks as if they will cushion the fall.

Climbing Everest is definitely on my wish list and I am really hoping to do it when I am 30.

Wednesday, October 7, 2015

TDD is not enough for your software`s QA


Recently the rise of unit testing, test-driven development, and agile methods has attested to a surge of interest in making the most of testing throughout all phases of the SDLC. However, testing is just one of many tools that you can use to ameliorate the code quality.
Almost every language has a tool that probe for violations of style guides, common gotchas, and sometimes crafty errors that can be hard to detect. Static analysis tool got in the reputation radar for giving a large number of false positive warnings and warnings to follow the style guide that are not necessarily required to follow.The good news about static analysis tools are that they can be configured to your needs. These tools can be configured either in your IDE or through command-line.
When rolling out a fresh new project, the team, unanimously should follow a certain standard of coding throughout the whole SDLC. In all, a coding standard should make it easier to work in the project, and maintain development speed from the beginning to the end.Obviosuly your linting tool will rain you with plethora of false positive error because it would not be able to guess your project`s coding pattern. But like I said earlier, they can be configured and you can roll your own static checker.
So, do not let testing be the terminal of your QA, make sure to take advantage of analysis tool.

Monday, October 5, 2015

Restarting unicorn


Every time you make any changes to your config files , you have to restart you server, at least that is what rails will notify you. It would be easy as pressing ctrl + c  if only you had run the rails server by doing rails s. But that is not the case if you are using servers such as nginx as your reverse proxy.

What you can do is, run service unicorn_appname restart in your app directory. If it works then that is fine. But if it does not and show you an error telling you to check your stderr file in the log directory, then follow on.
If you take a look at you stderr log file you will see something like this.
It is telling me that there is a process already running. So you have to kill that process and start your unicorn application server again.

Run ps aux | grep unicorn and it will list all the running processes. Since unicorn is running on 2710 i need to kill it.
pkill 2710 will kill the process and after that run service unicorn_fuitter start and now your app will be working just fine.

Sunday, October 4, 2015

Running rails app with Unicorn + Nginx


If you have come from PHP background , you will probably loose your nerve trying to get a simple hello world rails app to work with your server. Getting rails app to work with the server is a little different from any php apps where you just have to place your php app inside the /html folder(in my case).

My system has RVM, rails , ruby, nginx, postgres.

First we need to install unicorn. Unicorn is an application server. Since unicorn cant not be accessed by users directly, we will use Nginx as a reverse proxy.

Navigate to your project directory and open your Gemfile and add gem 'unicorn' gem. Then run bundle install.
Now we need to configure it.

Inside your config directory add unicorn.rb file.

unicorn.rb

# set path to application
app_dir = File.expand_path('./')
shared_dir = "#{app_dir}/tmp"
working_directory app_dir


# Set unicorn options
worker_processes 2
preload_app true
timeout 30

# Set up socket location
listen "#{shared_dir}/sockets/unicorn.sock", :backlog => 64

# Logging
stderr_path "#{shared_dir}/log/unicorn.stderr.log"
stdout_path "#{shared_dir}/log/unicorn.stdout.log"

# Set master PID location
pid "#{shared_dir}/pids/unicorn.pid"


Now lets create the required directories

mkdir -p tmp/log tmp/sockets tmp/pids 

Give those directories necessary read/write permission
Now we will create a init script that will load on boot.

sudo nano /etc/init.d/unicorn_appname
 
You can name appname whatever you want
unicorn_appname

#!/bin/sh

### BEGIN INIT INFO
# Provides:          unicorn
# Required-Start:    $all
# Required-Stop:     $all
# Default-Start:     2 3 4 5
# Default-Stop:      0 1 6
# Short-Description: starts the unicorn app server
# Description:       starts unicorn using start-stop-daemon
### END INIT INFO

set -e

USAGE="Usage: $0 <start|stop|restart|upgrade|rotate|force-stop>"

# app settings
USER="sushant"
APP_NAME="appname"
APP_ROOT="/usr/share/nginx/html/app" #in my case
ENV="development"

# environment settings
PATH="/home/$USER/.rvm/shims:/home/$USER/.rvm/bin:$PATH"
CMD="cd $APP_ROOT && bundle exec unicorn -c config/unicorn.rb -E $ENV -D"
PID="$APP_ROOT/shared/pids/unicorn.pid"
OLD_PID="$PID.oldbin"

# make sure the app exists
cd $APP_ROOT || exit 1

sig () {
  test -s "$PID" && kill -$1 `cat $PID`
}

oldsig () {
  test -s $OLD_PID && kill -$1 `cat $OLD_PID`
}

case $1 in
  start)
    sig 0 && echo >&2 "Already running" && exit 0
    echo "Starting $APP_NAME"
    su - $USER -c "$CMD"
    ;;
  stop)
    echo "Stopping $APP_NAME"
    sig QUIT && exit 0
    echo >&2 "Not running"
    ;;
  force-stop)
    echo "Force stopping $APP_NAME"
    sig TERM && exit 0
    echo >&2 "Not running"
    ;;
  restart|reload|upgrade)
    sig USR2 && echo "reloaded $APP_NAME" && exit 0
    echo >&2 "Couldn't reload, starting '$CMD' instead"
    $CMD
    ;;
  rotate)
    sig USR1 && echo rotated logs OK && exit 0
    echo >&2 "Couldn't rotate logs" && exit 1
    ;;
  *)
    echo >&2 $USAGE
    exit 1
    ;;
esac


Update the scripts permission and enable unicorn to boot on start

sudo chmod 755 /etc/init.d/unicorn_appname
sudo update-rc.d unicorn_appname defaults
 
Now open

sudo nano /etc/nginx/sites-available/default
 
default

upstream app {
    # Path to Unicorn SOCK file, as defined previously
    server unix:/usr/share/nginx/html/app/tmp/sockets/unicorn.sock fail_timeout=0; #in my case
}

server {
    listen 80;
    server_name example.com;

    root /usr/share/nginx/html/app/public; #in my case

    try_files $uri/index.html $uri @app;

    location @app {
        proxy_pass http://app;
        proxy_set_header X-Forwarded-For $proxy_add_x_forwarded_for;
        proxy_set_header Host $http_host;
        proxy_redirect off;
    }

    error_page 500 502 503 504 /500.html;
    client_max_body_size 4G;
    keepalive_timeout 10;
}
  

Open your hosts file and add
127.0.0.1       example.com
then
sudo service unicorn_appname restart
sudo service nginx restart  If you browse to example.com your app should be running

Saturday, September 26, 2015

Getting CKEditor to work with laravel 5.1

I rarely code in PHP these days but I had to use  Laravel, a great framework, for one of my project. My project required a WYSIWYG editor for its blogging section. I thought of giving ckeditor a try. The installation process was fairly simple.  All I had to do was place the necessary files/folders inside public directory (in my case) and then link the ckeditor.js file in my html. You can also use CDN to include ckeditor.The installation process was painless, however I found it very hard to get the file browser working. In this tutorial, I will talk about getting the file browser up and running.

During the time of writing this, my laravel version is 5.1.17(LTS). I am using Linux Mint 17.1 , sublime text 3 as my text editor, nginx as my server and mysql as my database. Except my laravel version and OS, the others are just extraneous, haha.

Ok, click in the editor`s image icon. You will see that there is no upload option.

To activate upload option, you have to add filebrowserImageUploadUrl.

CKEDITOR.replace('editor1',{
        filebrowserImageUploadUrl : "{{route('infos.upload',['_token' => csrf_token() ])}}",
        filebrowserWindowWidth  : 800,
        filebrowserWindowHeight : 500
    });


Here the filebrowserImageUploadUrl , will send a POST request to the route. If you remove the '_token' => csrf_token() you will get a tokenMismatch error.filebrowserWindowWidth & filebrowserWindowHeight is related with the appearance of the popup window`s dimension.

Lets create a route for 'info.upload'.

Route::post('infos/uploadImage',[
        'as' => 'infos.upload',
        'uses' => 'InfoController@uploadImage'
    ]);


uploadImage method in InfoController

public function uploadImage(Request $request)
    {
        $file = $request->file('upload');
        $uploadDestination = public_path() . '/uploads/about';
        $filename = preg_replace('/\s+/', '', $file->getClientOriginalName());
        $fileName = md5($filename) . "_" . $filename;
        $file->move($uploadDestination, $fileName);
    }


All the uploaded files will be upload to uploads/about folder, which is arbitrary.

At this point, your file should be uploaded. If not try opening your developers tool and check the network tab, there you can trace any errors.

Ok, now your file has been uploaded but you have to include it . To do that you have to add certain keys.
CKEDITOR.replace('editor1',{
        filebrowserBrowseUrl: "{{route('infos.image.browse')}}",
        filebrowserUploadUrl : '/browser/upload/type/all',
        filebrowserImageBrowseUrl: "{{route('infos.image.browse')}}",
        filebrowserImageUploadUrl : "{{route('infos.upload',['_token' => csrf_token() ])}}",
        filebrowserWindowWidth  : 800,
        filebrowserWindowHeight : 500
    });


Lets take a look at the routes now.

Route::post('infos/uploadImage',[
        'as' => 'infos.upload',
        'uses' => 'InfoController@uploadImage'
    ]);

    Route::get('infos/image/browse',[
        'as' => 'infos.image.browse',
        'uses' => 'InfoController@browseImage'
    ]);


This will how our controller looks right now:

public function uploadImage(Request $request)
    {
        $file = $request->file('upload');
        $uploadDestination = public_path() . '/uploads/about';
        $filename = preg_replace('/\s+/', '', $file->getClientOriginalName());
        $fileName = md5($filename) . "_" . $filename;
        $file->move($uploadDestination, $fileName);
    }

    public function browseImage(Request $request)
    {
        $test = $_GET['CKEditorFuncNum'];
        $images = [];
        $files = \File::files(public_path() . '/uploads/about');
        foreach ($files as $file) {
            $images[] = pathinfo($file);
        }
        return view('infos.file',[
            'files' => $images,
            'test' => $test
        ]);
     
    }


This will be the contents of our view file
@extends('app')

@section('content')
    @foreach($files as $file)
        <a href='{{url("uploads/about/".$file["basename"])}}'><img src='{{url("uploads/about/".$file["basename"])}}'></a>
    @endforeach
@endsection

@section('footer')
<script type="text/javascript">
$('a[href]').on('click', function(e){
    window.opener.CKEDITOR.tools.callFunction(<?php echo $test; ?>,$(this).find('img').prop('src'))
});
</script>
@endsection


This line of code window.opener.CKEDITOR.tools.callFunction(<?php echo $test; ?>,$(this).find('img').prop('src')) gets the url of clicked image and then put it into the url field.
That`s all there is to it.
If you run into any problem, leave a comment below. I hope to sort it out.

Monday, September 7, 2015

Alone at an altitude of 3800 m

 [Link to all the pictures that I took]

Trip cost break down

I paid Rs 426 for my ticket to Charikot.
I bought 2 kilo`s of guava at Rs 100.
I ate aloo and puri at Rs 50.
I bought Rs 600 worth of Churpee.
I paid Rs 250 for a room.
I paid Rs 50 for a bowl of hot noodle.
I paid Rs 130 for Daal-Bhaat-Aloo
I paid Rs 325 for my bus fare from Charikot to Kathmandu.

Tips and tricks for solo trekking


If anyone asks you whether you are traveling alone , tell them that your friends are coming behind you. That way if s/he is a potential threat, they will back off.

Put all your chargers in one polythene bag.


The sun had not yet peeped through its curtain of clouds when I boarded the so called super express bus from the old bus park and I was all set to go to Charikot. I had already bought my ticket a day before my solo trip. After 5 hours of bus ride, covering 150km from Kathmandu, I reached Charikot. The recent earthquake had its toll up to there too. 5 hrs of bus ride was not exhausting as there were a lot of waterfalls on the way. They were sort of eye candy for me.

Upon reaching Charikot, as unknown a tourist can be, I asked some locals for direction to Kuri. Carrying my 3kilo bag pack, I followed the direction. I had never traveled alone before and never had I carried anything while traveling. I would take just a few steps and before I know I would be resting. Since I had no plans of getting lost, I frequently asked the locals for direction. Little did I know, one of the fellow local was heading towards his village near Deurali.

Deurali
Deurali, is also the point in the route to get to Kuri. We talked about the shortes way to Kuri and shared guava that I had bought at Dolalghat. After an hour we reached Kuri and exchanged goodbyes.

Road to Kuri

From Deurali, I started to trek alone. I had read in some blogs that bears and leopards were common there. That information really motivated me to keep pacing until I reached to Kuri. Reaching Kuri was a far cry as the 3 kilo bag and the uphill ascend was holding me back, slowing me down.


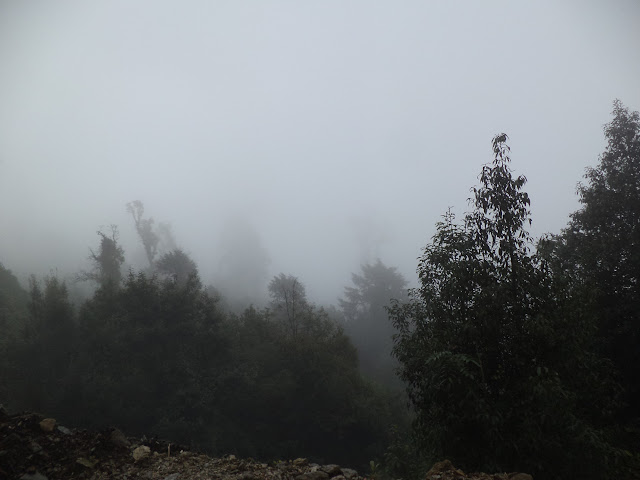
My solo trip started to get really scary as the fog started to set in and the visibility was poor. Whenever the fog moved , the trees would make rustling noise and it would drizzle too. To make the scene even more scarier there were the roaring noise of waterfalls, scary bird`s call and the branches of the tress covered with mosses hanging down like in any ghost or thriller movies. I wanted to quit so bad but I had no idea how far Kuri was. I told myself ,"This whole solo trek is what I have been whining about from a year. Now I am doing it, why quit? Look, if I survive this, then I have one hell of a story to tell. SOLO , of all of the things I could do , I choose solo. How stupid have I become?". After 3 hours of walk I saw an old man appearing out of dense fog from the opposite direction. I was so happy to finally meet someone and again I asked him about the direction and time to reach Kuri.

After another hour of hiking, I heard someone chopping trees. I again asked him for direction and he told me that the nearest settlement was just 5 mins away.


 I reached there and talked with the locals.

There I bought 6 pieces of churpee. Since I had to reach Kuri the very same day, I had to bid them goodbye. After walking for another hour I finally met two young guys riding down on a motorcycle. I asked them about the direction and they told me it is just 10 mins away.

Visual of Kuri

Because the visibility was very poor I did not see Kuri until I reached near Kuri. I had to book the lodge as soon as possible as it was really cold up there. To satisfy my hunger I ate hot noodles. Since it was off-season there was not much options to choose from for dinner. So I settled for Daal-Bhaat-Aloo.

Kalinchowk hill

The morning of the very next day, I started my journey up to Kalinchowk. At an altitude of nearly 4000 m I was all alone. After I had finished worshiping to the goddess Kali, I started my descend which only took me about 30 mins.

Good bye Kalinchowk and Kuri
I had to leave for Charikot as soon as possible because if the fog would again set it , it would be another suicide mission. On the way I met a local who was traveling to Charikot to sell his Churpee and he took me to Charikot.